


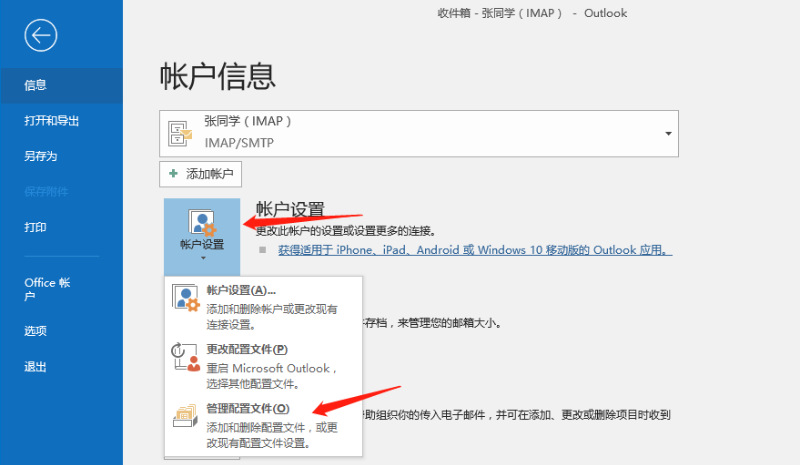
1.打开outlook,点左上角“文件”,依次点开“账户设置”以及“管理配置文件”。
1.Click“File” in the upper left corner of Outlook,and then click "Account Settings" and "Managing Configuration Files".
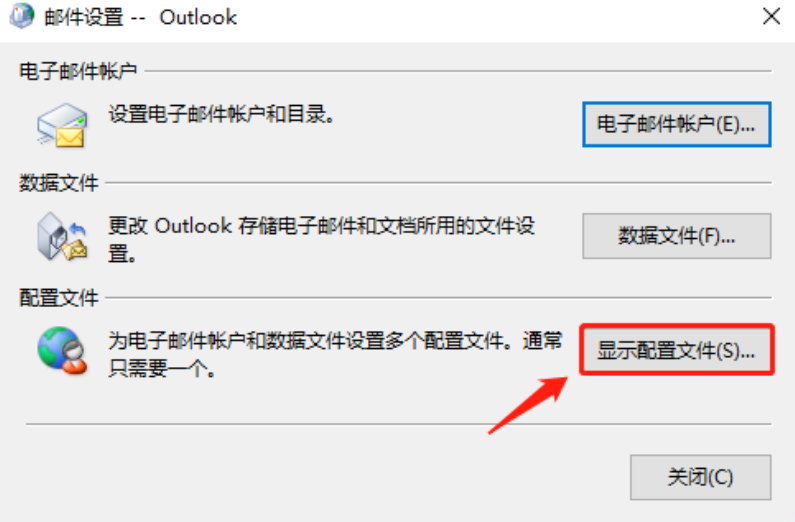
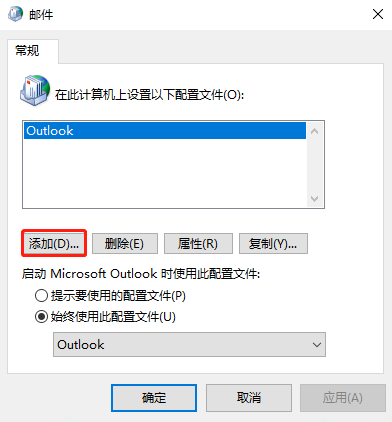
2.点击“显示配置文件”,然后点击“添加”,新建一个新的配置文件,名称只要不和之前配置文件重复即可。
2.Click "Show Configuration Files", and then click "Add" to create a new configuration file with a name different from the previous one.
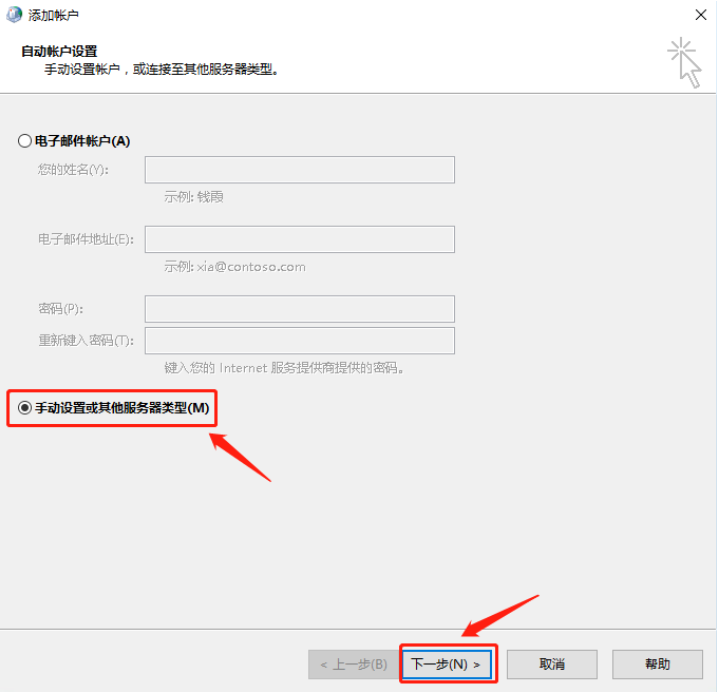
3.选择“手动设置”并点击“下一步”。
3.Select "Manual Setup" and click "Next".

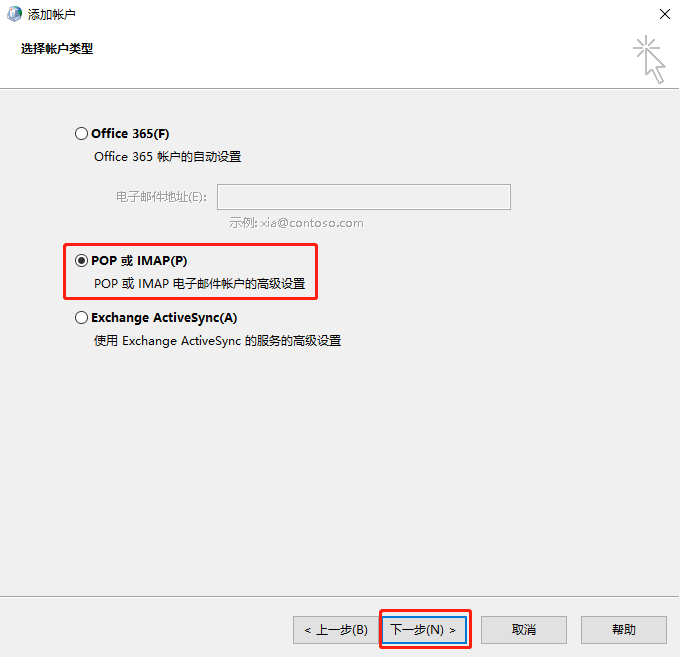
4.选择“POP或IMAP”,并点击“下一步”。
4.Select "POP or IMAP" and click "Next".
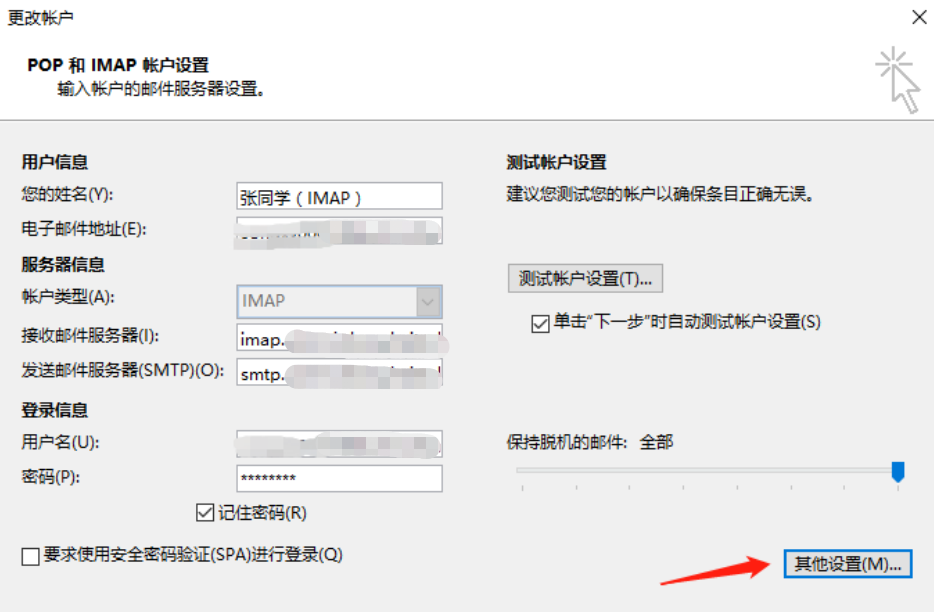
5.按要求填写完成用户信息(您的姓名:自定义,建议与原邮箱配置有所区分,服务器类型:选择“IMAP”,用户名:需要填写完整邮箱地址,例如xxx@shanghaitech.edu.cn)。
邮箱服务器信息配置如下:
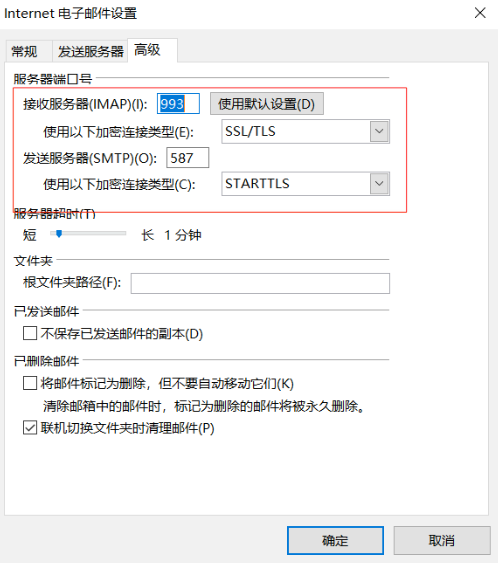
接收服务器:imap.shanghaitech.edu.cn,加密连接类型: SSL/TLS,端口: 993;
发送服务器:smtp.shanghaitech.edu.cn,加密连接类型: STARTTLS,端口: 587 (切换新邮件系统后,建议配置加密连接类型:SSL/TLS,端口:465)。
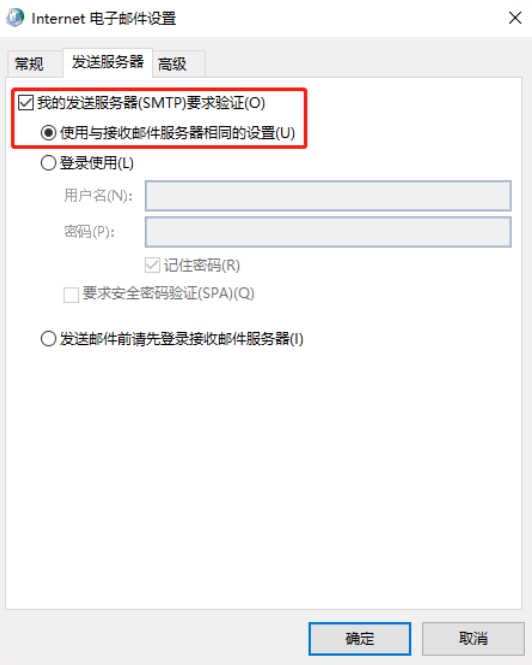
点击“其他设置”,在“发送服务器”页面中,勾选“我的发送服务器(SMTP)要求验证”,并配置接收和发送邮件服务器加密连接类型和端口号。
5.Fill in the user information as required (your name: user-defined, recommended to be different from the original email configuration;server type: select IMAP; user name: fill in the complete email address, for example xxx@shanghaitech.edu.cn).
The email server configuration is as follows:
Receiving Server: imap.shanghaitech.edu.cn, Encryption Type: SSL/TLS, port: 993;
Sending Server: smtp.shanghaitech.edu.cn, Encryption Type: STARTTLS, port: 587 (After switching to the new email system, it is recommended to configure the Encryption Type:SSL/TLS, Port:465).
Click Other Settings, andclick My sendingserver (SMTP) requires authenticationon the Sending Server page.Configure the encryption type and port of the receiving and sending servers. Click Confirm, and then click Next.
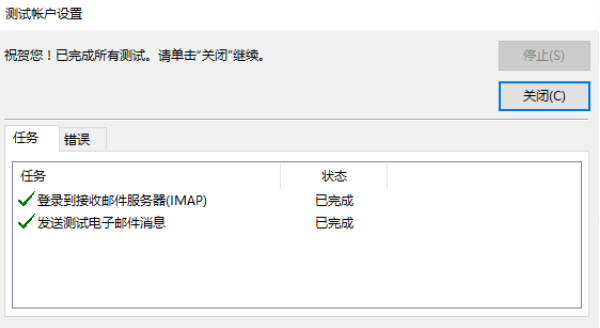
6.测试账号成功后,点击关闭,提示“设置全部完成”,把“在我手机也设置outlook”勾去掉,点“完成”。
6.After the test is complete, click Close, and it will prompt “Settings are complete”.Unclick “Configuring Outlook on my mobile phone”, and click “Finish”.
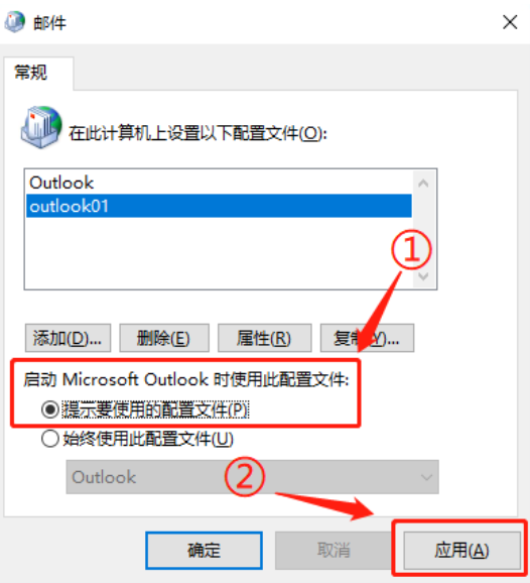
7.根据下图进行勾选“启动Microsoft Outlook时使用此配置文件”选择“提示要使用的配置文件”,选完后点“应用”即可。
7.According to the figure below, check “Using this profile when opening Microsoft Outlook” and select “Promptinga configuration profile to use", and click Apply.
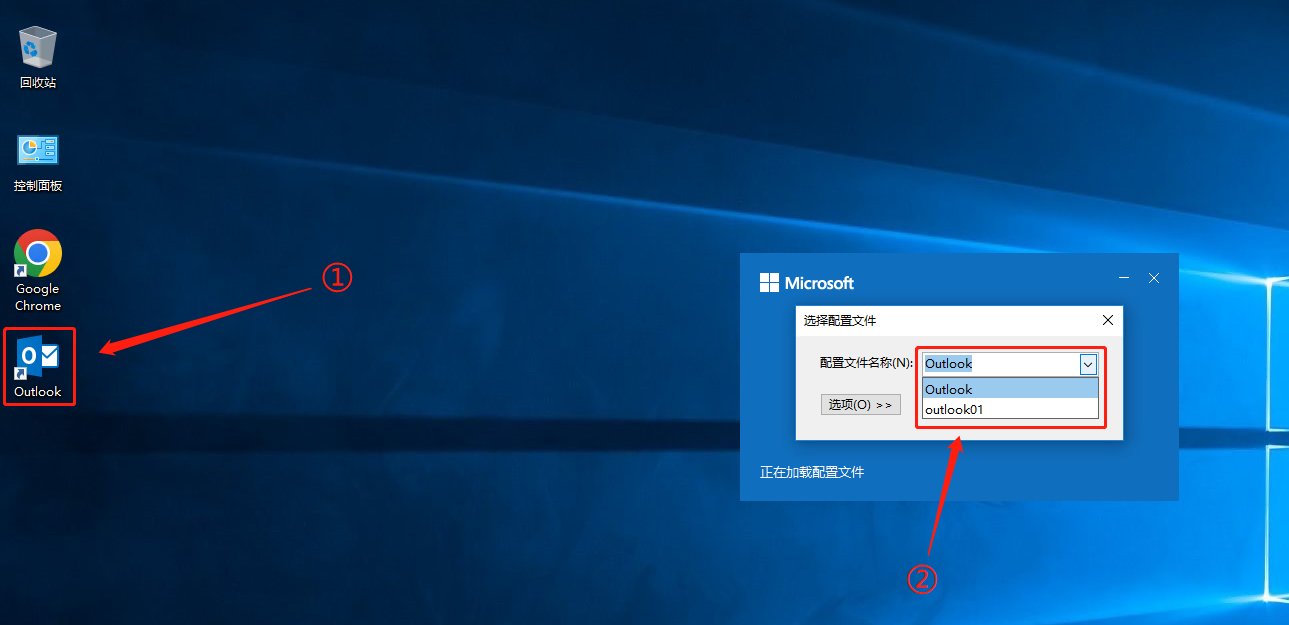
8.以上步骤配置完成后,双击打开桌面outlook图标,outlook弹出窗口提示“选择配置文件名称”,这里我们选择新建的配置文件“outlook01”。这时outlook就只会显示新建的邮箱账户的内容。如需要查看历史账号,则可以选择“outlook”这个配置文件进行切换。
8.After the above steps are finished, double-click to open the Outlook, and a pop-up window of Outlook will prompt Select the name of the configuration file. Here you can select the newly created configuration file Outlook01. Then, Outlook will only display the content of the newly created email account. If you want to view the historical account, please select the Outlook configuration file to switch.
9.新配置账户同步完成后,对比数据无差异可删除原exchange账号配置。
9.After the new account is synchronized, delete the Exchange account configuration if the data is consistent.

